Introduction
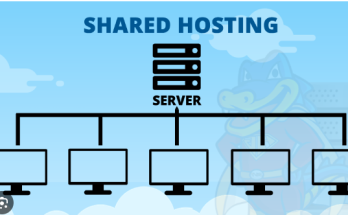
Shared hosting is an excellent option for hosting multiple websites on a single server, making it a cost-effective and resource-efficient solution for individuals and small businesses. In this guide, we will walk you through the step-by-step process of creating your own shared hosting environment. By the end, you’ll have a fully functional hosting platform capable of hosting multiple websites.
Step 1: Choose a Suitable Server
The first step in creating a shared hosting environment is selecting an appropriate server. Consider factors such as server resources, reliability, and scalability. Popular choices include Virtual Private Servers (VPS) or cloud services from providers like Amazon Web Services (AWS) or DigitalOcean.
Step 2: Set Up the Operating System
Once you have your server, it’s time to set up the operating system. Opt for a reliable and secure operating system such as CentOS, Ubuntu, or Debian. Follow the installation prompts and configure basic settings like the hostname and network settings.
Step 3: Install a Web Server
A web server is crucial for hosting websites. Apache and Nginx are popular choices. Choose the one that aligns with your preferences and install it on your server. Configure the server to handle multiple domains by setting up virtual hosts.
Step 4: Configure DNS Settings
Domain Name System (DNS) configuration is essential for associating domain names with IP addresses. Set up DNS records for each domain you plan to host. You can use a domain registrar’s DNS services or set up your own DNS server for more control.
Step 5: Implement a Control Panel
To simplify the management of your shared hosting environment, consider installing a control panel like cPanel, Plesk, or Webmin. These tools provide user-friendly interfaces for managing domains, email accounts, databases, and more.
Step 6: Secure Your Hosting Environment
Security is paramount in a shared hosting setup. Implement measures such as firewalls, regular system updates, and SSL certificates to secure communication. Configure the control panel’s security settings and enforce strong passwords for users.
Step 7: Set Up Email Services
Create email accounts for each hosted domain using your control panel. Configure mail servers like Postfix or Exim and implement spam filtering to enhance email security. Ensure proper email authentication to prevent misuse.
Step 8: Install Database Software
Most websites rely on databases for storing and retrieving data. Install a database server such as MySQL or PostgreSQL. Configure databases for each hosted website, and set up user permissions for secure data management.
Step 9: Enable Backup Solutions
Implement a robust backup strategy to safeguard your hosted data. Regularly back up website files, databases, and configuration settings. Explore automated backup solutions and store backups in a secure location.
Step 10: Monitor and Optimize Performance
Regularly monitor server performance using tools like Munin or Nagios. Optimize resource usage, troubleshoot issues promptly, and scale resources as needed to accommodate growing website traffic.
Conclusion
Creating a shared hosting environment involves careful planning and execution. By following these steps, you’ll have a solid foundation for hosting multiple websites efficiently and securely. Keep abreast of industry trends and updates to continually enhance your hosting environment and provide a reliable service to your clients.
Title: Creating a Shared Hosting Environment: A Step-by-Step Guide
Introduction:
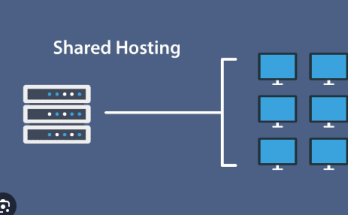
Shared hosting is an excellent choice for individuals and small businesses looking to establish an online presence without the complexity and cost of managing a dedicated server. In this comprehensive guide, we will walk you through the process of creating a shared hosting environment, allowing you to host multiple websites on a single server.
Step 1: Choose a Reliable Hosting Provider
The first crucial step in setting up shared hosting is selecting a reliable hosting provider. Consider factors such as server uptime, customer support, and pricing plans. Popular hosting providers include Bluehost, SiteGround, and HostGator.
Step 2: Select a Hosting Plan
Once you’ve chosen a hosting provider, select a hosting plan that aligns with your website’s needs. Shared hosting plans typically come with different levels of resources, such as disk space, bandwidth, and the number of domains you can host.
Step 3: Register a Domain Name
Before setting up hosting, you need a domain name for your website. Many hosting providers offer domain registration services, or you can use a separate domain registrar like GoDaddy or Namecheap.
Step 4: Configure Domain and DNS Settings
After registering a domain, configure the domain and DNS settings to point to your hosting provider’s nameservers. This step ensures that visitors to your domain are directed to the correct server.
Step 5: Set Up Your Hosting Account
Once your domain is configured, create a hosting account with your chosen provider. This involves entering your contact information, selecting your hosting plan, and setting up a username and password for your hosting control panel.
Step 6: Access the Hosting Control Panel
Most hosting providers use cPanel or a similar control panel to manage hosting settings. Log in to your hosting account and access the control panel. Here, you can manage domains, databases, email accounts, and other hosting-related features.
Step 7: Create and Configure Addon Domains
If your hosting plan allows for multiple domains, you can add additional websites to your hosting account as addon domains. Configure these domains within the control panel, specifying directories and other settings as needed.
Step 8: Upload Website Files
With your hosting environment set up, upload your website files to the server. You can use FTP (File Transfer Protocol) or the control panel’s file manager to upload files to the appropriate directories.
Step 9: Set Up Email Accounts
Configure email accounts associated with your domain through the hosting control panel. This step involves creating email addresses, setting up mailboxes, and configuring email clients for communication.
Step 10: Implement Security Measures
Enhance the security of your shared hosting environment by implementing measures such as SSL certificates, regular backups, and strong passwords. Most hosting providers offer tools within the control panel to manage these aspects.
Conclusion:
Congratulations! You’ve successfully created a shared hosting environment, allowing you to host multiple websites on a single server. Regularly monitor your hosting resources and website performance to ensure a smooth online experience for your visitors.